Translate

Thursday, 29 June 2017

Mini 1275GT reassembly and electrolysis of rusty parts!


Here's a few pictures of what's been absorbing most of my time lately....


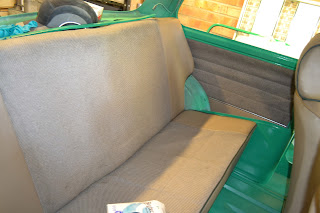
It doesn't look like much, but there's all new brake lines fitted, lots of parts cleaned and painted and reunited with the car!

To clean up a lot of the metal parts, I've taken to electrolysis...

This involves making a mixture of about 10% ordinary washing soda (you can get this from Sainsbury's in the UK, £1.20 in my local store for a 1kg bag) and tap water.

You'll need a nice clean piece of ordinary mild steel (Don't use stainless). I used a plate, you can see it in the centre of the tank. And you'll need a power supply (I used my adjustable bench supply)

Connect the clean steel to the positive terminal, this becomes our sacrificial anode. You'll probably realise from the name, that this isn't a piece of steel you'll want to use again....


Attach the rusty part to the negative pole, and drop it in the tank.... Keep a small distance between the part and the steel plate.

Switch the supply on, and adjust the voltage until a bit of current flows. Small bubbles will rise to the surface. I found good results with about an amp of current flowing.

You'll want to do this in a very well ventilated area, as the bubbles are hydrogen and oxygen, and PLEASE switch off the supply before adding or removing things from the tank, a spark could ignite the gas.....

After a new hours remove your once rusty part.

You'll need to clean off the solution, dry it and paint it to prevent it rusting rapidly.


What's happened to the rust? It's on the anode ....

This is after just a couple of days of use... you can clean it up with a wire brush or grinder and it'll go again :)

Simple Arduino Thermostat with MAX7219 Display and DS18B20 sensor

Just shows how these jobs snowball....

James had seen Oto's dehumidifer controller, and said "I need something to monitor and control the temperature of my honey warming cabinet" (it's a beekeeping thing!)

A simple thermostat, with a nice clear LED display, and adjustable set point was born ....


You'll see the code, and most of the schematic is very close to the dehumidifier controller, so I'll not dwell too much on that.. the main difference is the use of the MAX7219 7 segment display, previously used on the GPS clock, and the DS18B20 temperature sensor, which I'd previously used in the pond pump controller.

Here's the code:


Ryan built up a nice enclosure....


... and, in a stroke of genius, added a strip of red PVC insulating tape to improve the contrast of the display!


Thursday, 25 May 2017

Sony Xperia Z5 Compact Camera replacement.

I've had my little Sony phone for a while now, and it has been superb....

... until the other day when the camera started to play up....


Hmmmm, not ideal.

If you put some pressure on the phone, around where the camera lens is, it would come back to life for a few seconds, sometimes with some bizarre effects...

.. not ideal at all....

I thought I could live without it, but after a week or so, I realised how much I used it for taking quick pictures of wiring etc ... I decided
I'd need to investigate, so I googled disassembly instructions, but couldn't find a video or instructions that had the same layout as my phone.

I removed the back of the phone and quickly diagnosed that the camera module itself was at fault (I was hoping some connector had just come lose, no such luck).

A new camera module was sourced from eBay for a princely some of £13.95 delivered... I ordered a replacement adhesive gasket kit as well (£2.45)


So here's how it's done...

Switch the phone off, and gently heat up the back of the phone with the wife's hairdryer or a heat gun set to low.


Get a sucker and a prying tool and gently remove the back. If it doesn't come away easily, heat it up a bit more. Don't risk bending the metal back....


Right, that's good.


Un-latch the NFC aerial connector at the end shown ....


... and lift it out of the way.


Unscrew the small pozi screws retaining the aerial module .....


... remove it, and place it to one side.


Undo all the screws on the plastic frame .....


... gently work a small insulated tool (this is a ceramic screwdriver) under the flash LED (it's retained with a small blob of adhesive) ...


... and hinge it out of the way.


Carefully prize the plastic frame out. The flash LED should slide through the frame.


Excellent.


Just for piece of mind, disconnect the battery.


Now prize up the camera connector....


... and remove the camera.


Worryingly, the new camera didn't come in ESD safe packaging....


... and was supplied with some sort of rubber gasket, which the original camera didn't have, I just slipped it off...


Some careful bending of the camera's ribbon cable, and it all fits in, and the connector is pushed home.

Now put the phone back together again. When fitting the frame make sure the flash pokes back through, and the NFC connector doesn't get trapped.

Replace the adhesive gasket, and replace the back...


... and go and take some photo's !


Got my thumb in as usual .... ;)


Friday, 19 May 2017

Return of the Arduino Dehumidifier controller.

My very good friend Oto has a problem.

He's moved into a new house.

He's wanted some space for his lathes & mills etc, which this has.

 After a few weeks, his machines are showing signs of going rusty.... Why is this?

 It's humidity.. after installing a dehumidifier, things have improved dramatically, except his electricity bill...

 It's time for a slightly revised version of the first project I did on this website back in May 2014 (where does the time go??!?)

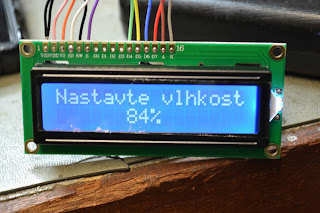
It's got a similar display, except it's in Czech, but it has an adjustable set point for humidity, and a mode switch to set between auto , whereby it switches on 5 degrees C before the dew point, or manual, where it switches on when the desired humidity set point is reached.

The mode switch is S2 on the diagram below, and S3 is a centre-biassed momentary toggle, which is used to alter the set point up or down.

The set point is stored in E2PROM, and is restored in the event of power failure.


The temperature and humidity is read from a DHT22 sensor, and the dew point calculated.

The dehumidifier is switched on with a suitable rated relay, via T1.

Here's the code:


... hope Google's translate has done a reasonable job!

Saturday, 13 May 2017

BSR UA14 "Monarch" Record player repairs and upgrades!!

I had one of these in a record player as a child. It was my father's from when he was young ...

... then my good friend Colin posted one up for sale on facebook.


Nostalgia flooded in and a deal was done....

The one I had as a child was a sort of blue/grey colour...

It's a 4 speed autochanger, made around 1962. At some stage in it's life, the original "flip over" cartidge (to select a stylus suitable for LP (45's and LPs's) and 78) had obviously failed (it was most likely a crystal cartridge), and someone had replaced it with a ceramic cartridge.. all mono of course..

Mechanically it was all complete, and the usual solidified grease problems were very minimal.

Now a ceramic cartridge is a nasty thing. Even the best track heavily, and will chew through records, not good.

Checking the tracking weight with the tracking weight spring on minimum (there's no counterweight here!) gives encouraging results...

(excuse the thumb)


This deck was never designed to track with modern light tracking carts of a few grammes, so a suitable stereo cart would need to be found.... digging around in the box of record player spares turned up a nice Shure SC35C broadcast cartridge, moving magnet, designed to track between 4 and 5g and a nice spherical stylus, so alignment shouldn't be too fussy... perfect... except it has the standard mounting using two holes... the arm on the BSR has one central hole... an adaptor plate would need to be fabricated. Even tracking at 4-5 grammes, the Shure won't damage my precious records because it has a very large diamond.


Thankfully, back in the 60's, the lovely people at BSR had thoughtfully wired the arm for stereo.

Now the cartridge doesn't look central in the arm, does it? I carefully made the adaptor plate, and it's spot on. I checked the alignment to the pivot, and it is spot on!


A quick tweak to the alignment with a "Stupid protractor" and check the weight...

Spot on the optimum weight! It's a pure fluke! One spring hole either way and it's 2g or 6 !!!


Lash the output into an amplifier, out with the K-Tel Rock Classics workshop test record....


Surprise of all surprises, it doesn't sound half bad! .... Then the rest of the afternoon was wasted playing records....


Now I'd better do something with the cardboard box plinth, and make something proper up!

Sunday, 23 April 2017

AVTECH / Reptile H264 CCTV box fault and repair.

I bought this CCTV box, and some cheap cameras a few years ago, after I had a motorcycle stolen (talk about closing the stable door etc etc).


Other than a hard disc replacement a good few years ago, it's been very reliable...

.. until recently, when it's been acting up a bit.

It's been losing it's network settings, preventing me checking up on things while I'm out via my mobile phone and the "Eagle Eyes" app. 

Get home, reset them and it's OK again for a day or so.

Everytime, it resets the network IP address to seemingly random 10.xxx.xxx.xxx address, which isn't compatible with my home network, which is the usual 192.168.xxx.xxx ... It also sets the port number to a random number too ...

Off with the lid ....

Not much inside, a small board, the HDD and a small power supply converter...


.... and a very guilty looking CR2032 lithium cell, which proved to be only reading 1.4V instead of 3v ....


Replacing this and resetting the settings on the box has sorted it :)