
It's that weird pantograph arm. It should track perfectly. I spotted this one, at one of those audio jumble meets. It's missing a lever or two, and the selector switches are sort of hanging there, the plinth battered and bruised.. £18 and it followed me home, much to the delight of the long and suffering Mrs Doz.
 It's seen a bit of action. There's the usual "Garrard glue" to deal with, but the main issues are with the control switches...
 There's some sort of mounting bracket missing or broken.
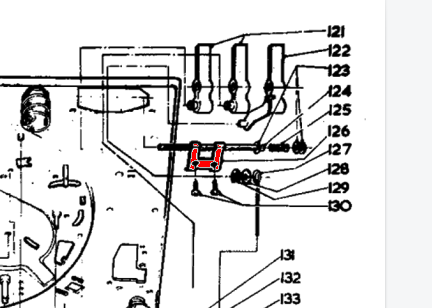 A quick look at the exploding diagram shows it's no 126...
 I managed to score a few parts on eBay, but sadly not the bracket. Those levers are in better nick than mine though...
 So a suitable bit of steel was cut and filed to shape...
 That looks like it should do the job. There's an issue though. The screws originally fitted into the plastic top plate, where there's a reinforced bit. It's broken off...
 I removed the levers (I wanted to change them anyway), and put some epoxy down to build up a layer to support the screws.
 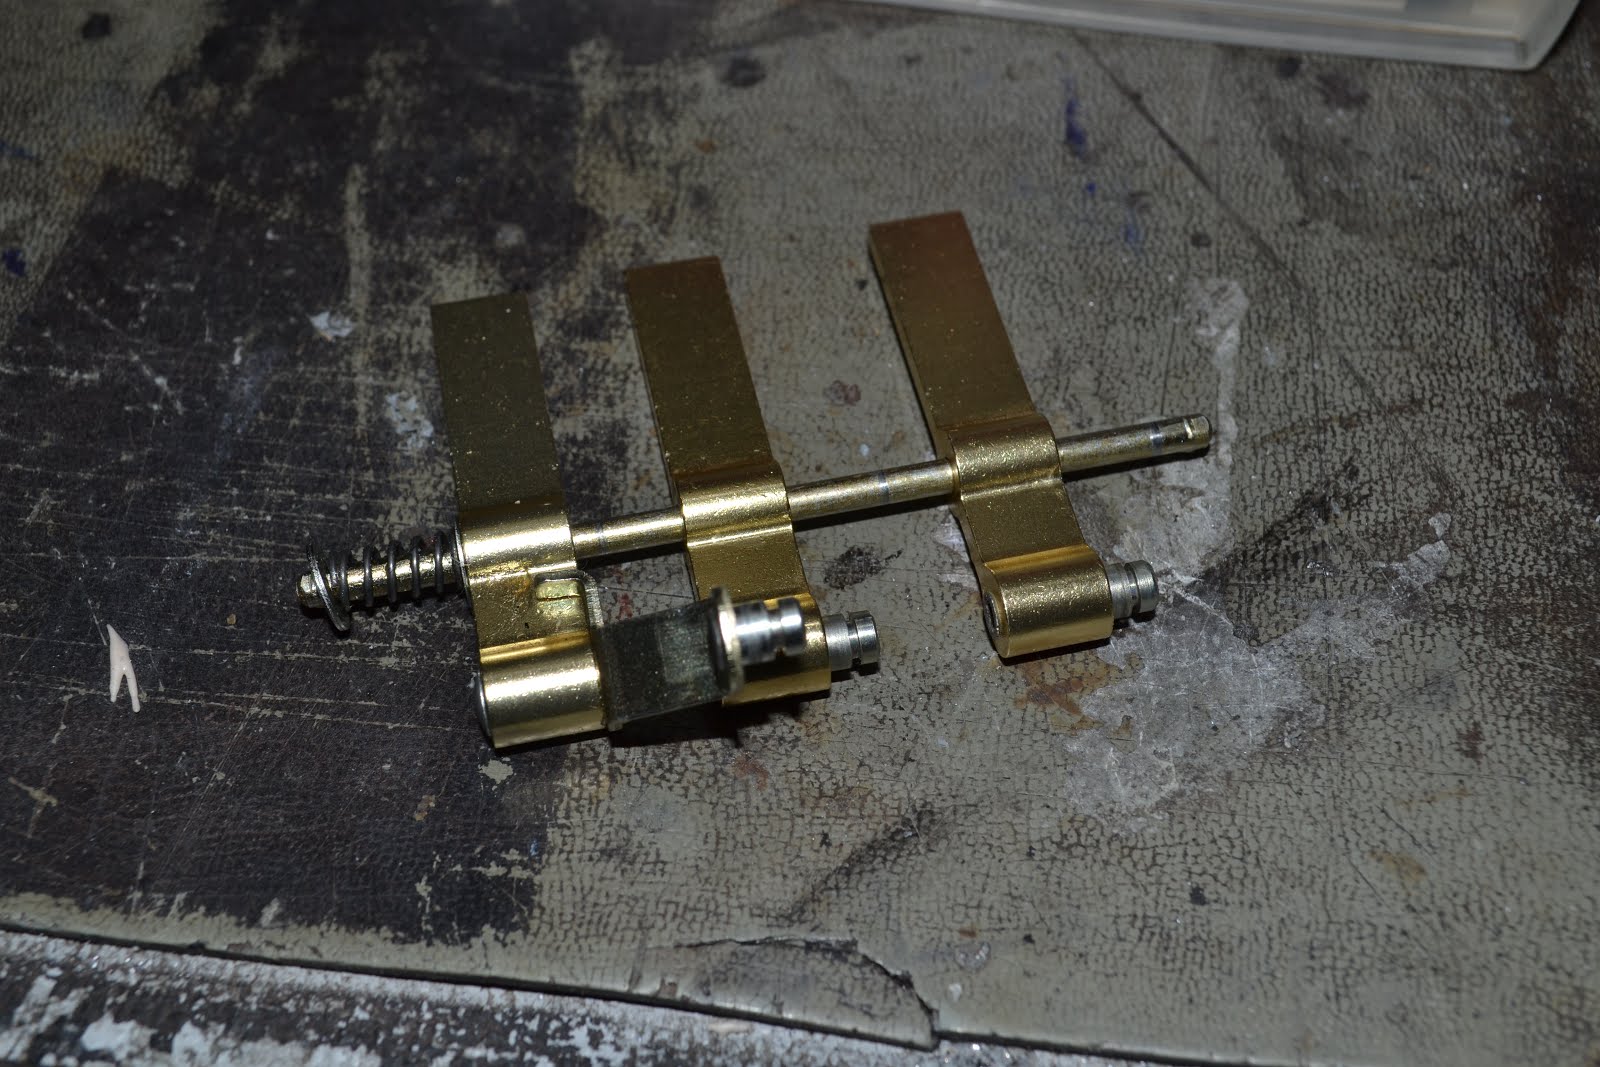 and while that's going off, I swap the levers over, and sort out removing the sticky grease from the rest of the mechanism..

Once the epoxy had cured it was flattened off, and it was at this point I realised that the top plate was no longer secured to the chassis. as again there were sheered off screw fittings... a change of tack was required, there just isn't enough strength here......

The bracket is reversed, and bonded to the chassis with some of the UV cure adhesive I've tried before... now I take it the UV has only cured the outside part, but it seems to be holding. Where the plastic top plate is broken off, I used the glue gun to fill the void, and fit a screw through my previous epoxy repair to secure the top plate at the other side. The clamp is simply holding the top plate flush.
 ... and the following morning, all the gluing seems to be very strong... good. Pretty it isn't, but it's now at least functional.
 The deck is flipped back over, and the platter removed, by removing the rubber mat, and removing the wire clip securing the centre spindle.
 The platter itself has the strobe markings on it's underside...
 ... which are viewed via a mirror in the "subterranian" strobe housing. It'll need removing to clean the mirror.
 Two screws either side, and it drops down...
 ... and we can clean the mirror. The small plastic window can also be removed and cleaned.
A quick note on how the speed adjust works.
The manual speed adjustment knob under the speed selector operates a lever, which moves the idler up and down a tapered section on the motor drive shaft, thus changing the speed. A bit "lenco" really...
 There's more grease to be cleaned up and replaced on the top. This lever is seized solid, and, once again, needed a bit of hot air to tempt it off.
The motor mounts are still supple, as is the idler, so that's good news.

Now to the Zero 100's arm. This is what interests me about this turntable ... it gives it it's name, Zero tracking error. The headshell actually moves as the arm moves across the record, removing the error. This one is horribly wobbly. Now because the headshell is articulated, it's never going to be the stiffest tonearm, but this is wobbling around from the pivot end.
 One screw removes the perspex gimbal surround, allowing a better view.
 Sure enough a tiny screw is missing, which secures the arm tube to the bearing. A replacement is found, dropped, lost and found again before being fitted.
 Now the arm is given a quick buff up to remove the worst of the corrosion on it's surface, and the brass cover on the counterweight is treated likewise.. Looking quite smart now :)
 Fitting a cartridge. Now the Zero 100, in common with a few other Garrard decks of the time uses a convenient cartridge slide. Convenient that is, if you happen to have one... I knew mine was missing, so I'd previously stopped into my favourite purveyor of Garrard bits, and managed to procure a new-old-stock slide. The contacts are a bit tarnished, but that'll soon clean up.
 My friend John had sent me a previously enjoyed AT95 a while back, so that was mounted onto the slide...
Normally the Zero 100 came with a perspex alignment gauge, that slid over the slider, and you just set your stylus onto the cross-hairs, and all is done. Obviously this was long-gone. As our arm compensates for any tracking error, using a conventional protractor and setting Stevenson, Baerwald etc is irrelevant. After nearly starting a fight on a Garrard forum (some people eh?) I hatched a plan... the arm should track something near parallel, so all I need is a line from the centre spindle out, move it about until our cartridge is on the line, move the arm in and out, and set the cartridge position so the line is followed.
 A piece of cotton is pressed into service, and the cartridge position set. There is a light curve to the track, however.
Tracking weight and anti-skate are set up as per the manual.

And successfully plays through the workshop test LP, scratched and warped though it may be.
Now to think about doing something to tidy up the plinth.
The whole process is very interesting, I have one too and I'm starting to fine-tune it. I can't find a spare pivot screw for the tonearm anywhere in Spain, where can I find it?
ReplyDeleteThe whole process is very interesting, I have one too and I'm starting to fine-tune it. I can't find a spare pivot screw for the tonearm anywhere in Spain, where can I find it?
ReplyDeleteI have the later 100SB, it seems if the cartridge is premounted you don't get the alignment tool, I'm the second owner from new so I asked the previous owner if they still had it which they advised they never got it. Managed to get one off an auction site and it's made a lot of difference to how it sounds.
ReplyDelete